Low vs Medium vs High PDF Compression: Which Mode Should You Use?
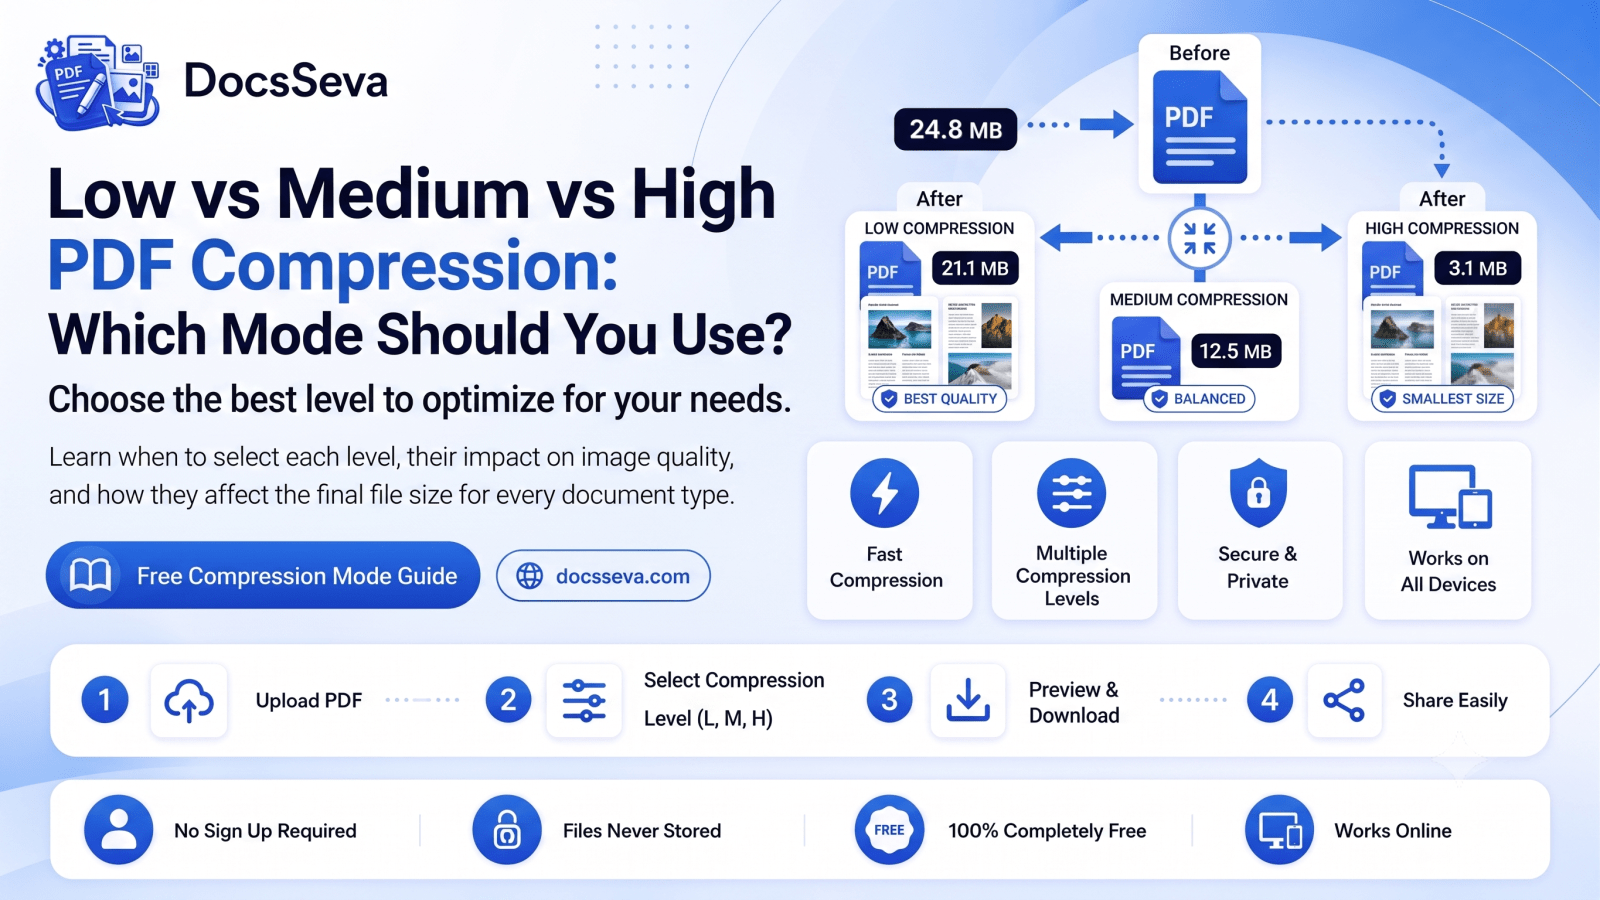
Low vs Medium vs High PDF Compression: Which Mode Should You Use?
Choosing a PDF compression level can be confusing.
Should you use Low compression to protect document quality? Is Medium compression sufficient for email? Should you select High compression for an online application? When should you use Screen mode?
The correct choice depends on what matters most for your document:
- Final file size
- Text readability
- Image clarity
- Printing quality
- Searchable and selectable text
- Upload limits
- Links and forms
- Intended viewing device
The strongest compression mode is not automatically the best mode.
A very small PDF may be unsuitable when its text becomes blurry, photographs lose detail, links stop working or searchable content is converted into page images.
Similarly, choosing a quality-focused mode may not help when a portal rejects the file because it remains too large.
This guide compares Low, Medium, High and Screen PDF compression so you can select the right setting for email attachments, job applications, government forms, scanned documents, printing and general online sharing.
To test the available modes, open the free DocsSeva PDF Compressor.
Quick Answer: Which PDF Compression Mode Should You Use?
Use the following rule as a starting point:
| Your requirement | Recommended mode |
|---|---|
| Preserve the highest visual quality | Low |
| Balance quality and file size | Medium |
| Meet a strict upload limit | High |
| Produce the smallest screen-viewing copy | Screen |
| Compress a resume or searchable document | Medium |
| Compress a print-focused portfolio | Low |
| Compress a scanned document | Medium, then High if required |
| Reduce a PDF below a portal limit | High |
| Reduce file size when selectable text is unnecessary | Screen |
For most everyday PDFs, Medium compression is the best starting point.
Use Low when quality is more important than size. Move to High when Medium does not meet your upload limit. Use Screen mode only when maximum reduction is required and searchable or selectable text is not essential.
What Is a PDF Compression Level?
A PDF compression level controls how aggressively the compressor attempts to reduce the document.
A lighter level normally:
- Preserves more image detail
- Produces a larger output
- Maintains better print quality
- Creates fewer visible compression artefacts
- Requires less modification to the document
A stronger level normally:
- Reduces image resolution further
- Applies stronger image encoding
- Produces a smaller output
- Prioritises screen viewing
- Increases the possibility of visible quality loss
The names Low, Medium and High usually refer to the strength of compression, not the final quality.
Therefore:
- Low compression means light size reduction and higher visual quality.
- High compression means stronger size reduction and potentially lower visual quality.
This distinction is important because some users assume “High” means high-quality output. In a compression control, it usually means a high level of compression.
Why Does DocsSeva Provide Multiple Compression Modes?
A single compression setting cannot meet every requirement.
Consider these examples:
A photography portfolio
A portfolio may contain detailed images that must remain sharp. The user may accept a larger file to protect visual quality.
A government application
A portal may reject every file above 500 KB. The user may need stronger compression even if the images become slightly softer.
A resume
A resume should remain readable and searchable while also meeting a job portal’s file-size limit.
A scanned certificate
The document may contain small text, a stamp, signature and registration number. Strong compression could make those elements difficult to read.
A final viewing copy
A user may only need a small PDF that can be opened and viewed on a phone. Searchable text and interactive features may not be important.
Multiple modes allow users to choose the best balance for each situation.
PDF Compression Modes at a Glance
| Feature | Low | Medium | High | Screen |
|---|---|---|---|---|
| File-size reduction | Light | Balanced | Strong | Strongest |
| Image quality | Highest | High | Moderate to high | Screen-focused |
| Text readability | Excellent | Excellent | Usually good | Depends on raster resolution |
| Selectable text | Preserved | Preserved | Preserved | Usually not preserved |
| Searchable text | Preserved | Preserved | Preserved | Usually not preserved |
| Print suitability | Best | Good | Limited for detailed printing | Mainly screen use |
| Email suitability | May remain large | Recommended | Useful for tight limits | Only when structure is unimportant |
| Scanned PDFs | Light reduction | Recommended starting point | Stronger reduction | Maximum reduction |
| Portfolios | Recommended | Acceptable | Use carefully | Usually avoid |
| Online forms | May remain too large | Try first | Recommended for strict limits | Final option |
| Links and forms | Usually preserved | Usually preserved | Should be checked | May be flattened |
| Best use | Quality | General use | Small files | Smallest viewing copy |
The exact result depends on the original PDF. Compression percentages cannot be guaranteed because every document contains different content.
Low PDF Compression
Low compression applies a lighter level of optimisation.
It prioritises visual quality and document detail over maximum file-size reduction.
What Low Compression Tries to Preserve
Low compression is intended to protect:
- High-resolution photographs
- Fine text
- Detailed charts
- Signatures
- Official stamps
- Illustrations
- Smooth colour gradients
- Print quality
- Sharp lines
- Searchable text
The output may remain relatively large, but the visible document should stay closer to the original.
When Should You Use Low Compression?
Choose Low compression for:
- Professional portfolios
- Photography documents
- Graphic design samples
- Print-ready reports
- Legal documents
- Certificates
- Detailed diagrams
- Product catalogues
- Architectural documents
- Medical reports containing detailed images
- Documents requiring only a small reduction
Low mode is appropriate when losing visual detail would be more problematic than having a larger file.
Advantages of Low Compression
Better image quality
Images normally retain more detail because less information is discarded.
Better print results
A document that appears clear on a screen may still look soft when printed. Low compression is generally safer for printing.
Lower risk of blurry text
This is especially important for scanned documents in which the text is part of the page image.
Better preservation of fine elements
Signatures, stamps, QR codes, diagrams and thin lines are less likely to become unclear.
Suitable for professional presentation
Portfolios, proposals and branded reports benefit from higher-quality output.
Limitations of Low Compression
Smaller size reduction
The output may still exceed an email or portal limit.
Not ideal for strict upload requirements
A portal requiring a PDF below 200 KB may require a stronger mode.
Large image-heavy PDFs may remain large
When a document contains many photographs, light optimisation may not be sufficient.
Example of Low Compression
Imagine an original portfolio measuring:
Original file: 24 MB
Low-compression result: 17 MB
The reduction is useful but not extreme.
The portfolio images may remain detailed enough for professional presentation and printing.
The exact result will vary according to the document.
Medium PDF Compression
Medium compression attempts to balance file size and visual quality.
For most users, it is the best first choice.
It normally produces a meaningful reduction while preserving enough quality for ordinary screen viewing, email, applications and document sharing.
When Should You Use Medium Compression?
Choose Medium compression for:
- Email attachments
- Resumes and CVs
- Assignments
- Business reports
- General document sharing
- Cloud uploads
- Job applications
- University documents
- Invoices
- Bank statements
- Text-based PDFs containing a few images
- Scanned files that do not require extreme reduction
Medium mode is suitable when you want a smaller document without applying the strongest available compression.
Advantages of Medium Compression
Balanced output
It provides a practical compromise between size reduction and readability.
Good for everyday documents
Most documents sent by email or uploaded online do not require print-production quality.
Preserves searchable text
In DocsSeva’s standard workflow, digital text remains selectable and searchable in Medium mode.
Suitable for resumes
Resume text can remain readable and searchable while the output becomes easier to upload.
Good starting point for scanned PDFs
It can reduce scan size without immediately applying aggressive image degradation.
Limitations of Medium Compression
May not meet very strict limits
A 10 MB scan may still remain above a 500 KB requirement.
Some image quality can be reduced
The difference may be small during ordinary viewing, but detailed photographs may show a slight reduction.
Not always suitable for high-quality printing
Professional print documents may require Low compression.
Example of Medium Compression
Consider a report containing text, screenshots and several photographs:
Original file: 24 MB
Medium-compression result: 9 MB
The result is much easier to email and store, while the document may remain clear for everyday viewing.
The actual result depends on the content of the original PDF.
High PDF Compression
High compression applies stronger optimisation to create a smaller PDF.
It prioritises file-size reduction while trying to keep the document readable.
High mode is useful when an online portal, email service or document system enforces a strict limit.
When Should You Use High Compression?
Choose High compression for:
- Government upload portals
- Job application websites
- Scholarship forms
- University admission portals
- Competitive examination forms
- Visa applications
- Loan applications
- Large scanned documents
- Strict email limits
- PDFs that remain too large after Medium compression
- Documents mainly intended for screen viewing
High mode should be used when meeting the file-size requirement is more important than preserving maximum image detail.
Advantages of High Compression
Stronger file-size reduction
High mode can create a significantly smaller output, especially for image-heavy and scanned documents.
Useful for strict portals
It can help when a website rejects larger files.
Faster uploads
A smaller file is generally faster to upload and download.
Reduced storage usage
High compression can be useful for document archives that do not require print-quality images.
Standard text can remain searchable
Low, Medium and High modes are intended to retain the digital text structure rather than converting the complete page into an image.
Limitations of High Compression
Images may appear softer
Photographs and scanned pages may lose fine detail.
Small scanned text requires checking
Registration numbers, signatures and stamps can become less clear.
Print quality may be reduced
A PDF that appears acceptable on a laptop may show reduced detail when printed.
QR codes and barcodes should be tested
Strong compression can affect the sharp edges needed for reliable scanning.
Detailed portfolios may lose professional quality
Use Low or Medium for image-focused presentation documents.
Example of High Compression
Consider a scanned application document:
Original file: 24 MB
High-compression result: 4.5 MB
The file is now easier to upload, but small text and stamps must be checked carefully.
The actual saving will vary for each PDF.
Screen PDF Compression
Screen mode is designed for maximum reduction and digital viewing.
Instead of preserving every original text, image and vector element separately, Screen mode may rasterise each page and save it as a page image.
This can simplify complex documents and create a much smaller viewing copy.
However, it changes the structure of the PDF.
What Happens When a PDF Is Rasterised?
Rasterisation converts the complete visual page into pixels.
Before rasterisation, a page may contain:
- Digital text
- Fonts
- Photographs
- Vector diagrams
- Links
- Form fields
- Annotations
After rasterisation, the page may become one combined image.
The page can still look similar, but its behaviour changes.
What Can Be Lost in Screen Mode?
Screen mode may affect:
- Text selection
- Text search
- Copy-and-paste functionality
- Screen-reader accessibility
- Interactive links
- Form fields
- Buttons
- Vector sharpness
- High-quality printing
- OCR text layers
Use Screen mode only when those features are not required.
When Should You Use Screen Mode?
Choose Screen mode when:
- The smallest possible output is required
- The document is a final viewing copy
- Users only need to open and read the pages
- Searchable text is not necessary
- Standard modes do not meet the upload limit
- The document contains complex page structures
- The PDF is intended mainly for phone or laptop viewing
When Should You Avoid Screen Mode?
Avoid it for:
- Resumes that may be processed by recruitment systems
- Searchable research papers
- Accessible documents
- Fillable application forms
- Interactive PDFs
- Digitally signed documents
- PDFs containing important links
- High-quality printing
- Legal documents that require original structure
- OCR documents that must remain searchable
Example of Screen Compression
A complex presentation might produce the following result:
Original file: 24 MB
Screen-mode result: 2.2 MB
The visual pages may remain readable on a screen, but text selection, links and vector quality may no longer be preserved.
Low vs Medium vs High vs Screen: Detailed Comparison
File-Size Reduction
From the lightest to strongest reduction:
- Low
- Medium
- High
- Screen
This order is general rather than guaranteed. A document that is already optimised may show little difference between Low and Medium.
Image Quality
From the highest to most reduced image detail:
- Low
- Medium
- High
- Screen
Screen mode quality depends on the resolution used when pages are rasterised.
Selectable and Searchable Text
| Mode | Selectable text | Searchable text |
|---|---|---|
| Low | Preserved | Preserved |
| Medium | Preserved | Preserved |
| High | Preserved | Preserved |
| Screen | Usually removed | Usually removed |
Use Low, Medium or High when users must search or copy text.
Print Quality
Low
Best for print-focused documents.
Medium
Suitable for ordinary office printing.
High
May be acceptable for basic printing, but detailed images can appear softer.
Screen
Designed mainly for digital viewing rather than high-quality printing.
Scanned Document Quality
Scanned text is stored as part of the page image.
This means strong image compression can directly affect letter clarity.
Recommended order for scanned documents:
- Try Medium.
- Check the output.
- Use High if the file is still too large.
- Use Screen only when searchability and maximum detail are unnecessary.
Accessibility
Low, Medium and High are safer choices when the document contains structural accessibility information.
Screen mode can remove:
- Text tags
- Reading order
- Alternative text
- Heading structure
- Selectable content
Avoid rasterisation when accessibility is required.
Links and Forms
Standard compression normally focuses on image and internal-data optimisation.
However, links and form fields should always be checked after processing.
Screen mode may flatten or remove interactive functionality.
Which Mode Should You Use for Different Documents?
Resume or CV
Recommended mode: Medium
A resume should remain:
- Readable
- Searchable
- Selectable
- Easy to upload
- Suitable for recruitment systems
Use High only when the portal limit requires it.
Avoid Screen mode unless there is no alternative.
Read: How to Compress a PDF Online for Free
Professional Portfolio
Recommended mode: Low
Portfolios often contain detailed images and carefully designed layouts.
Use Medium when you need a smaller email version.
Avoid High or Screen unless file-size reduction is more important than presentation quality.
Email Attachment
Recommended mode: Medium
Medium usually provides a useful balance.
Move to High when the attachment remains too large.
Use Screen only when searchable text and links are unnecessary.
Government Application
Recommended mode: High
Government portals often enforce strict limits.
After compression, inspect:
- Registration numbers
- Identification details
- Signatures
- Stamps
- Certificate text
- Photographs
Use Medium first when the limit allows it.
University Assignment
Recommended mode: Medium
Assignments and research documents should normally keep searchable text.
Use High when the learning portal rejects the Medium result.
Avoid Screen for research papers that users need to search or quote.
Scanned Certificate
Recommended mode: Medium, then High if required
Check:
- Student or applicant name
- Registration number
- Date
- Grade
- Signature
- Seal
- Small printed text
Do not sacrifice essential readability only to reach an extremely low limit.
Legal Document
Recommended mode: Low or Medium
Legal documents can contain:
- Fine print
- Signatures
- Page numbering
- Stamps
- Annotations
- Bookmarks
- Links
Use a stronger mode only after carefully verifying the output.
Bank Statement
Recommended mode: Medium
Check account details, dates, transaction values and fine print.
Follow the applicable privacy requirements before processing financial documents.
Invoice or Receipt
Recommended mode: Medium
Move to High for large batches or strict email limits.
Ensure that product names, totals, tax information and payment details remain readable.
Print-Ready Brochure
Recommended mode: Low
Print documents need higher image resolution than screen-only PDFs.
Medium may be acceptable for an email preview, but the final print copy should retain sufficient detail.
Mobile Viewing Copy
Recommended mode: High or Screen
Use High when searchable text is important.
Use Screen when the user only needs a small final viewing copy.
Which Mode Should You Use for Exact File-Size Limits?
PDF Below 5 MB
Try Medium first.
Move to High only if necessary.
PDF Below 2 MB
Medium may work for text-focused documents.
Image-heavy PDFs may require High.
PDF Below 1 MB
High compression may be necessary.
Remove unnecessary pages before applying stronger compression.
PDF Below 500 KB
Use High after reducing unnecessary content.
Screen mode may be required for image-heavy files.
PDF Below 200 KB
Reaching this size may require:
- Removing pages
- Extracting only required pages
- Strong image compression
- Screen mode
- Recreating the PDF from optimised source images
Not every document can reach 200 KB while remaining clear.
PDF Below 100 KB
This is an extremely strict limit for multi-page or image-heavy PDFs.
The result depends on:
- Page count
- Image content
- Scan resolution
- Colour
- Required readability
Never make important information unreadable solely to meet a number.
How to Choose the Right Compression Mode Step by Step
Step 1: Identify the Document Purpose
Ask whether the PDF is intended for:
- Printing
- Job applications
- Government portals
- Education portals
- Mobile viewing
- Long-term storage
- Professional presentation
The purpose should determine the quality requirement.
Step 2: Check the Upload Limit
Confirm the maximum permitted file size.
Do not apply High compression when Medium already meets the limit.
Step 3: Decide Whether Text Must Remain Searchable
Use Low, Medium or High when users need to:
- Search text
- Select text
- Copy content
- Use accessibility tools
- Process the document through automated systems
Avoid Screen mode in these situations.
Step 4: Check Whether the PDF Is Scanned
Try selecting a word inside the PDF.
If text cannot be selected, the pages may be scanned images.
Scanned PDFs require careful visual checking because compression directly affects the page text.
Use the DocsSeva PDF OCR tool when a scanned PDF needs searchable text.
Step 5: Begin With Medium
Medium is the safest general starting point.
Download and inspect the result before moving to a stronger mode.
Step 6: Compare the Result With the Original
Check:
- File size
- Text clarity
- Image detail
- Page count
- Signatures
- Stamps
- Searchability
- Links
- Forms
- Printing quality
Step 7: Increase Compression Only When Necessary
Move from Medium to High when the result remains above the required limit.
Use Screen as the final option when document structure is not important.
How to Compress a PDF Using DocsSeva
Step 1: Open the PDF Compressor
Visit:
Step 2: Select Your PDF
Choose the file from your device or drag it into the upload area.
Before processing, confirm that:
- The document opens correctly
- All required pages are present
- You have kept the original file
- The PDF is not corrupted
- Any required password is available
- You have permission to process the document
Step 3: Select the Compression Mode
Choose:
- Low for maximum quality
- Medium for balanced compression
- High for a smaller output
- Screen for maximum screen-focused reduction
Step 4: Start Compression
Begin the compression process.
The time required can depend on:
- Original file size
- Number of pages
- Number of images
- Scan resolution
- Compression mode
- Available device memory
- Browser performance
Keep the page open until processing is complete.
Step 5: Download the Output
Open the downloaded PDF immediately.
Check:
- All pages
- Text readability
- Image quality
- Page orientation
- Signatures
- Stamps
- Links
- Searchable text
- File size
Keep the original PDF until the output has been approved.
How to Compare Two Compression Results
When deciding between Medium and High, do not compare only the file sizes.
Use the following checklist.
Check the Document at 100% Zoom
Inspect:
- Small text
- Thin lines
- Image edges
- Signatures
- Official seals
- QR codes
- Barcodes
Search for a Word
Confirm that searchable text remains available when required.
Select and Copy Text
Test whether text can still be selected and copied.
Test Important Links
Open internal and external hyperlinks.
Check Every Page
An image-heavy page may show quality loss even when the first page looks fine.
Print a Sample Page
When printing matters, print one detailed page before approving the full output.
Compare File Sizes
Calculate whether the additional saving from High is worth the difference in visual quality.
For example:
Medium result: 5.2 MB
High result: 4.8 MB
When High saves only 400 KB but noticeably reduces quality, Medium may be the better choice.
Why Do Compression Results Vary?
The selected mode does not produce the same percentage reduction for every PDF.
Results vary according to the content.
Image-Heavy PDFs
These often show a large reduction because oversized images can be downsampled and re-encoded.
Text-Only PDFs
These may show a smaller reduction because digital text already requires little storage.
Scanned PDFs
These can show substantial reduction, but readability must be checked carefully.
Already Optimised PDFs
A PDF exported for web viewing may have little unnecessary data left to remove.
Complex Vector Documents
Technical drawings and illustrations may not respond like photographic PDFs.
PDFs With Attachments
Embedded files may remain a significant part of the output unless they are removed separately.
PDFs With Many Fonts
Font subsetting and duplicate-font optimisation may provide additional savings.
What Should You Do When High Compression Is Not Enough?
Remove Unnecessary Pages
Use the DocsSeva PDF Page Remover.
Deleting pages reduces the file without lowering the quality of the pages you keep.
Extract Only the Required Pages
Use the DocsSeva PDF Page Extractor.
This is useful when an application requires only selected certificates or supporting pages.
Split the PDF
Use the DocsSeva PDF Splitter when the portal accepts multiple documents.
Compress Source Images
When creating a PDF from photographs, reduce the image sizes before generating the document.
Use the DocsSeva Image Compressor.
Rebuild the PDF From Optimised Images
Use DocsSeva Images to PDF to create a new document from optimised source images.
Try Screen Mode
Use Screen mode only when searchable text and interactive document features are not required.
Confirm the Actual Limit
Check whether the portal:
- Uses KB or MB
- Accepts several files
- Allows another format
- Requires only selected pages
- Provides separate fields for different documents
Common Compression-Level Mistakes
Assuming High Means High Quality
High normally refers to compression strength, not output quality.
Selecting Screen Mode for a Resume
Rasterising a resume may remove searchable text and reduce its usefulness for recruitment systems.
Choosing Low for a Strict Portal
A quality-focused output may remain above the portal limit.
Applying High Compression Immediately
Start with Medium. Stronger compression should be used only when required.
Compressing an Already Compressed Output
Repeated lossy compression can progressively reduce image quality.
Create every new attempt from the original PDF.
Deleting the Original File
Always keep an unchanged copy until the compressed output has been approved.
Checking Only File Size
A smaller file is not successful when its content becomes unreadable.
Ignoring Links and Forms
Test interactive elements after compression.
Forgetting About Printing
A screen-friendly output may not produce a high-quality print.
Using Screen Mode on Accessible Documents
Rasterisation may remove structural information required by screen readers.
Recommended Compression Workflow
Follow this workflow for most documents:
- Keep the original PDF.
- Remove unnecessary pages.
- Begin with Medium compression.
- Download and inspect the output.
- Confirm whether the file meets the required limit.
- Use Low when better quality is required.
- Use High when Medium remains too large.
- Use Screen only when the smallest viewing copy is required.
- Check text, images, links and forms.
- Upload or share the approved result.
This approach avoids unnecessary quality loss.
Related DocsSeva Compression Guides
Continue reading these guides:
- How to Compress a PDF Online for Free
- Complete Guide to PDF Compression
- How Does PDF Compression Work?
Update these URLs if your Day 1, Day 2 or Day 3 articles use different slugs.
Related DocsSeva Tools
Complete your PDF workflow with these free tools:
- PDF Compressor — reduce PDF file size
- PDF Merger — combine multiple documents
- PDF Splitter — divide a large PDF
- PDF Page Remover — delete unnecessary pages
- PDF Page Extractor — extract selected pages
- PDF OCR — make scanned documents searchable
- PDF to Images — convert pages into images
- Images to PDF — create PDFs from images
- Image Compressor — optimise source images
- PDF Password — add password protection
- PDF Unlock — remove an authorised restriction
Frequently Asked Questions
1. What is the difference between Low, Medium and High PDF compression?
Low prioritises visual quality, Medium balances size and quality, and High applies stronger optimisation to produce a smaller file.
2. Which PDF compression level is best?
Medium is the best starting point for most documents. The correct level depends on your file-size limit and quality requirement.
3. Does High compression mean high quality?
No. High usually means a high level of compression, which creates a smaller file and may reduce image quality more than Low or Medium.
4. Which mode creates the smallest PDF?
Screen mode normally provides the strongest reduction, but it may convert pages into images and remove searchable text.
5. Which compression level preserves the best quality?
Low compression normally preserves the most visual detail.
6. Which compression level is best for email?
Medium is generally recommended. Use High when the attachment remains too large.
7. Which mode is best for a resume?
Medium is usually best because it balances size and readability while retaining searchable text.
8. Which mode is best for a job portal?
Try Medium first. Use High when the file remains above the portal’s limit.
9. Which mode is best for government forms?
High may be required for strict upload limits. Check signatures, stamps and small text carefully.
10. Which mode is best for scanned PDFs?
Start with Medium and move to High only when necessary.
11. Which mode is best for printing?
Low compression is generally the safest option for high-quality printing.
12. Which mode is best for a portfolio?
Use Low to preserve image detail. Medium may be suitable for an email version.
13. Does Medium compression reduce quality?
It may apply some image optimisation, but it is designed to maintain a practical balance between clarity and file size.
14. Will High compression make text blurry?
Digital text generally remains sharp in standard compression. Text inside scanned page images may become softer.
15. Does Low compression significantly reduce file size?
It can reduce size, but the result may be limited because the mode prioritises quality.
16. Does Screen mode remove selectable text?
Screen mode may rasterise pages, which normally means that text is no longer separately selectable or searchable.
17. Does High compression preserve searchable text?
Low, Medium and High modes are intended to preserve the PDF’s digital-text structure.
18. Can compression affect hyperlinks?
Standard compression may preserve hyperlinks, but they should always be tested after processing.
19. Can Screen mode remove hyperlinks?
Rasterising pages may flatten or remove interactive links.
20. Can compression affect PDF forms?
Strong structural changes or rasterisation can flatten form fields. Test the output before submission.
21. Can compression affect OCR text?
Standard modes may preserve an OCR text layer. Rasterisation can remove searchability when the layer is not retained.
22. Can I compress a PDF below 1 MB using Medium mode?
It depends on the original document. Text-focused PDFs may reach the target, while image-heavy files may require High compression.
23. Can High compression reduce a PDF below 100 KB?
It may work for short and simple documents, but no exact result can be guaranteed.
24. Why is my Low-compression PDF still large?
The mode protects image quality and may apply only limited reduction.
25. Why is there little difference between Medium and High?
The original PDF may already be optimised or contain mostly digital text.
26. Why did High compression make my images blurry?
High mode can reduce image resolution and quality more aggressively to create a smaller output.
27. Should I compress the same PDF several times?
No. Repeated compression may reduce quality without producing a meaningful additional saving.
28. Should I use Screen mode for legal documents?
Usually not. Legal documents may require searchable text, links, signatures or original structure.
29. Should I use Screen mode for an assignment?
Avoid it when searchable text is required. Use Medium or High instead.
30. Can Screen mode improve the size of a complex PDF?
It may significantly reduce complex documents by converting each page into a simpler image.
31. Does Low compression preserve fonts?
Low compression is intended to preserve document quality, but every output should still be checked.
32. Can High compression change page dimensions?
Compression normally reduces stored data rather than changing visible page dimensions.
33. Which mode is best for bank statements?
Medium is a suitable starting point. Check all transaction details and fine print.
34. Which mode is best for certificates?
Use Medium first. Move to High only when a strict upload limit requires it.
35. Which mode is best for photography PDFs?
Low is generally best because image detail is important.
36. Which mode is best for mobile viewing?
High can provide a smaller searchable document. Screen mode can be used for a very small final viewing copy.
37. Can High compression affect QR codes?
Strong compression may soften QR-code edges. Test every important code after processing.
38. Can compression affect digital signatures?
Changing a digitally signed PDF can invalidate its signature. Compress the document before signing whenever possible.
39. Should I remove pages before compression?
Yes. Removing unnecessary pages reduces file size without lowering the quality of the remaining pages.
40. Should I merge PDFs before compression?
Remove unwanted pages, merge the required files and then compress the final combined document.
41. Can I use different modes for different PDFs?
Yes. Each PDF should be compressed according to its own content and intended use.
42. Can batch PDFs produce different results with the same mode?
Yes. A scanned PDF, text document and image portfolio will respond differently to the same setting.
43. Is the smallest PDF always the best result?
No. The best result is the smallest file that remains readable and preserves the features you need.
44. How do I check compression quality?
Compare the output with the original at 100% zoom and test text, links, forms, signatures and images.
45. What should I do when High compression is not enough?
Remove unnecessary pages, split the document, optimise source images or use Screen mode when searchable text is not required.
Choose the Right Balance Between Size and Quality
Low, Medium, High and Screen compression modes exist because every PDF has a different purpose.
Use Low when preserving image and print quality is most important.
Use Medium for email, resumes, assignments and everyday sharing.
Use High when a portal or attachment limit requires a smaller file.
Use Screen when the smallest possible viewing copy is required and searchable text or interactive features are unnecessary.
Do not select a mode based only on its name.
Start with Medium, inspect the result and increase compression only when the file remains too large.
The best output should:
- Meet the required upload limit
- Keep text readable
- Preserve enough image detail
- Retain required document functionality
- Open correctly on the recipient’s device
- Remain suitable for its intended purpose
DocsSeva Editorial Team
Published on July 26, 2026
Browse all tools
29+ free document tools, no account required.
Browse all toolsRelated articles
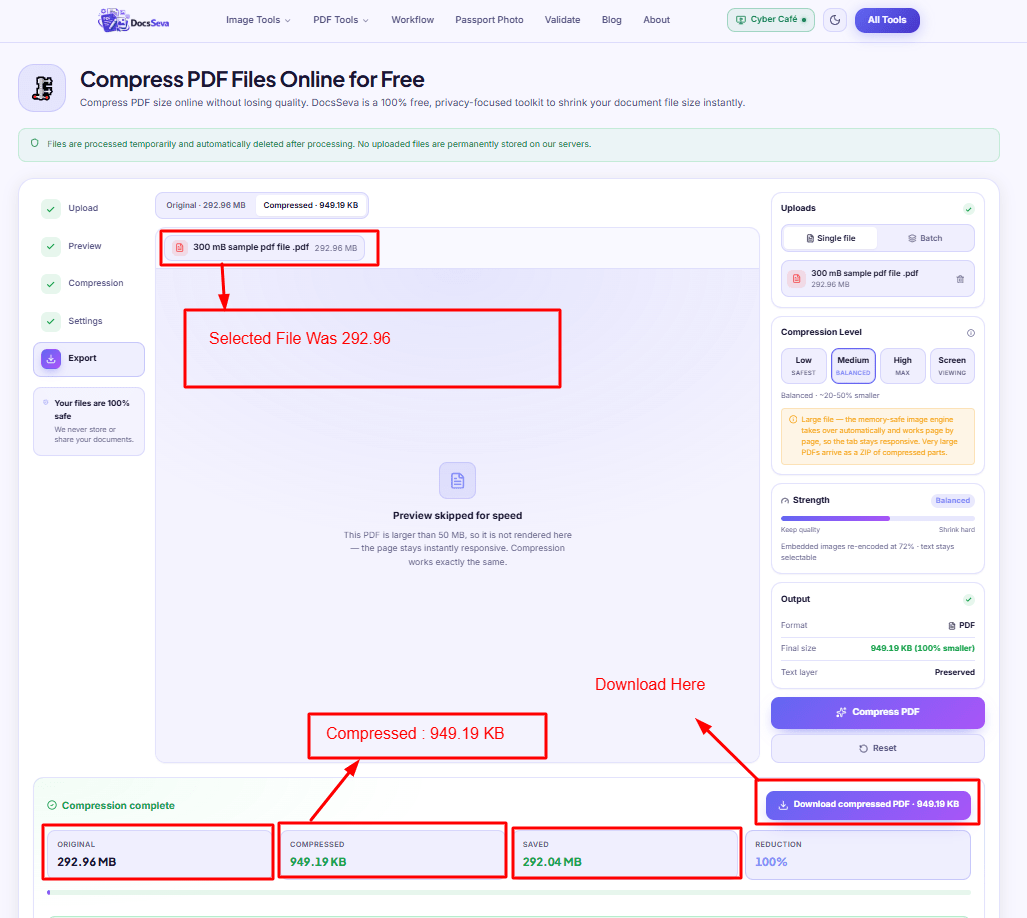
In-Depth How-to Guide
Compress a 300 MB Scanned PDF Without Freezing the Tab
A 180-page, 312 MB scan crashes the tab and comes back as a ZIP. Why that happens, what each level does to your pages, and the cheaper step to take first.
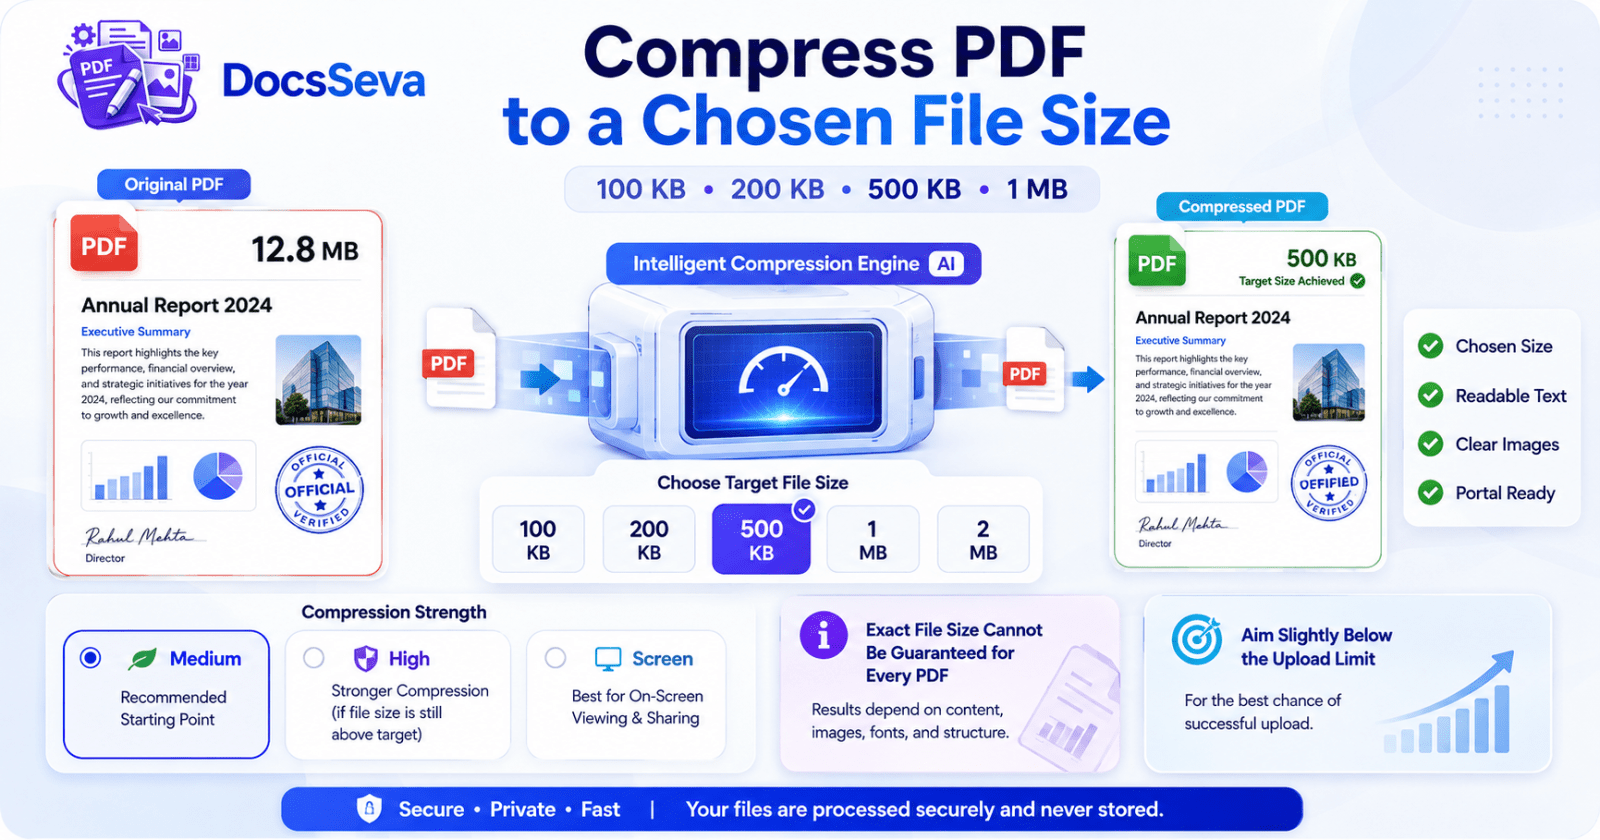
How to Compress a PDF to a Chosen File Size Without Losing Quality
Learn how to compress a PDF to a chosen file size such as 100 KB, 200 KB, 500 KB, 1 MB or 2 MB while preserving readable text, clear images and essential document details.
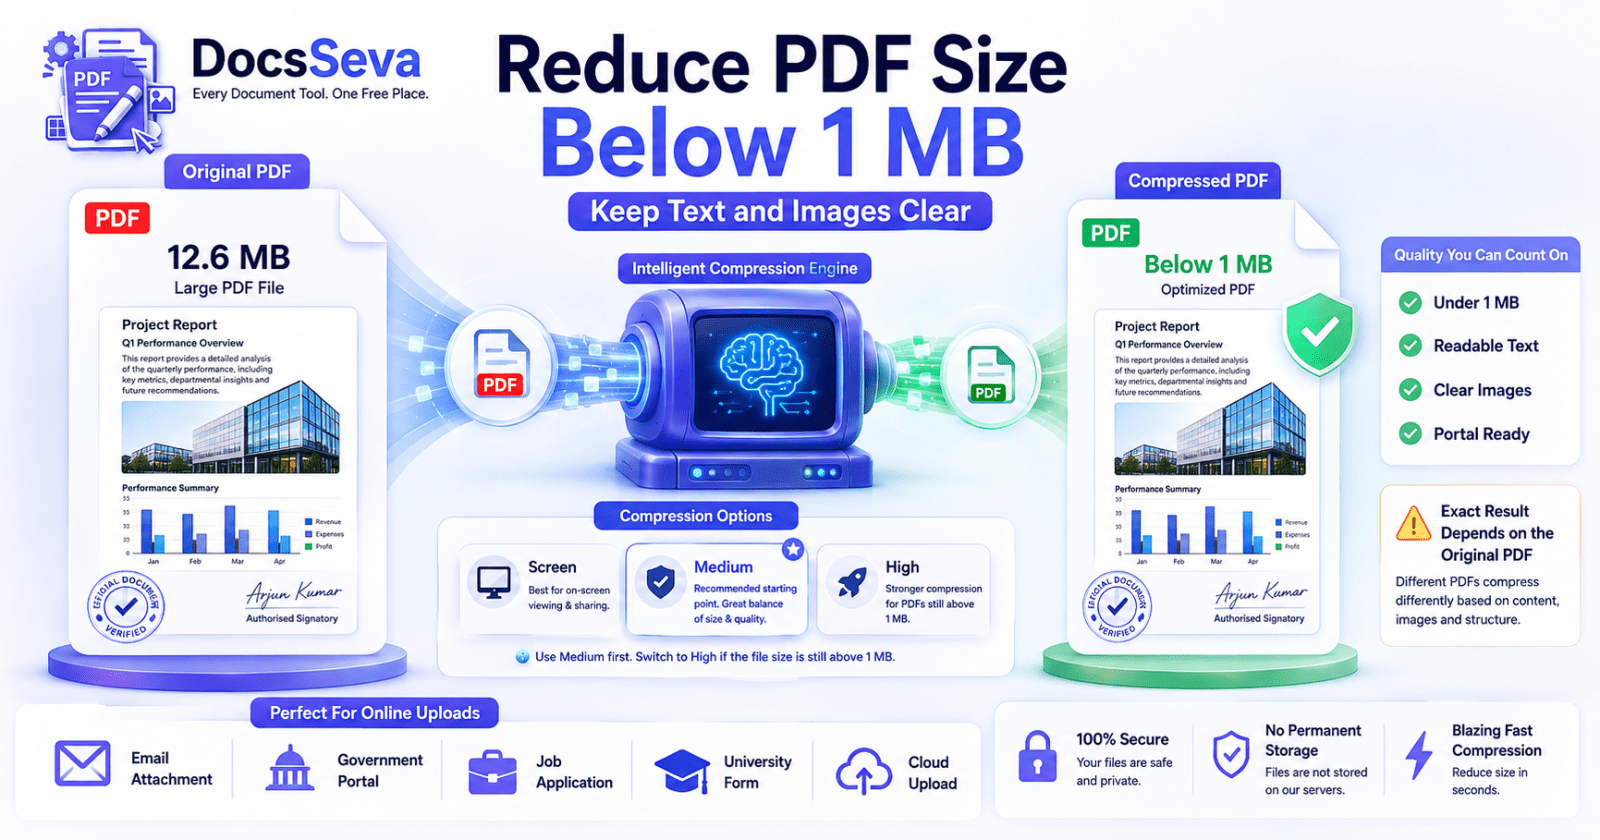
How to Reduce PDF Size Below 1 MB Without Losing Readability
Learn how to reduce PDF size below 1 MB for email, government portals, job applications and online forms while keeping text, images and signatures readable.