Compress PDF for Gmail Attachments Without Losing Quality
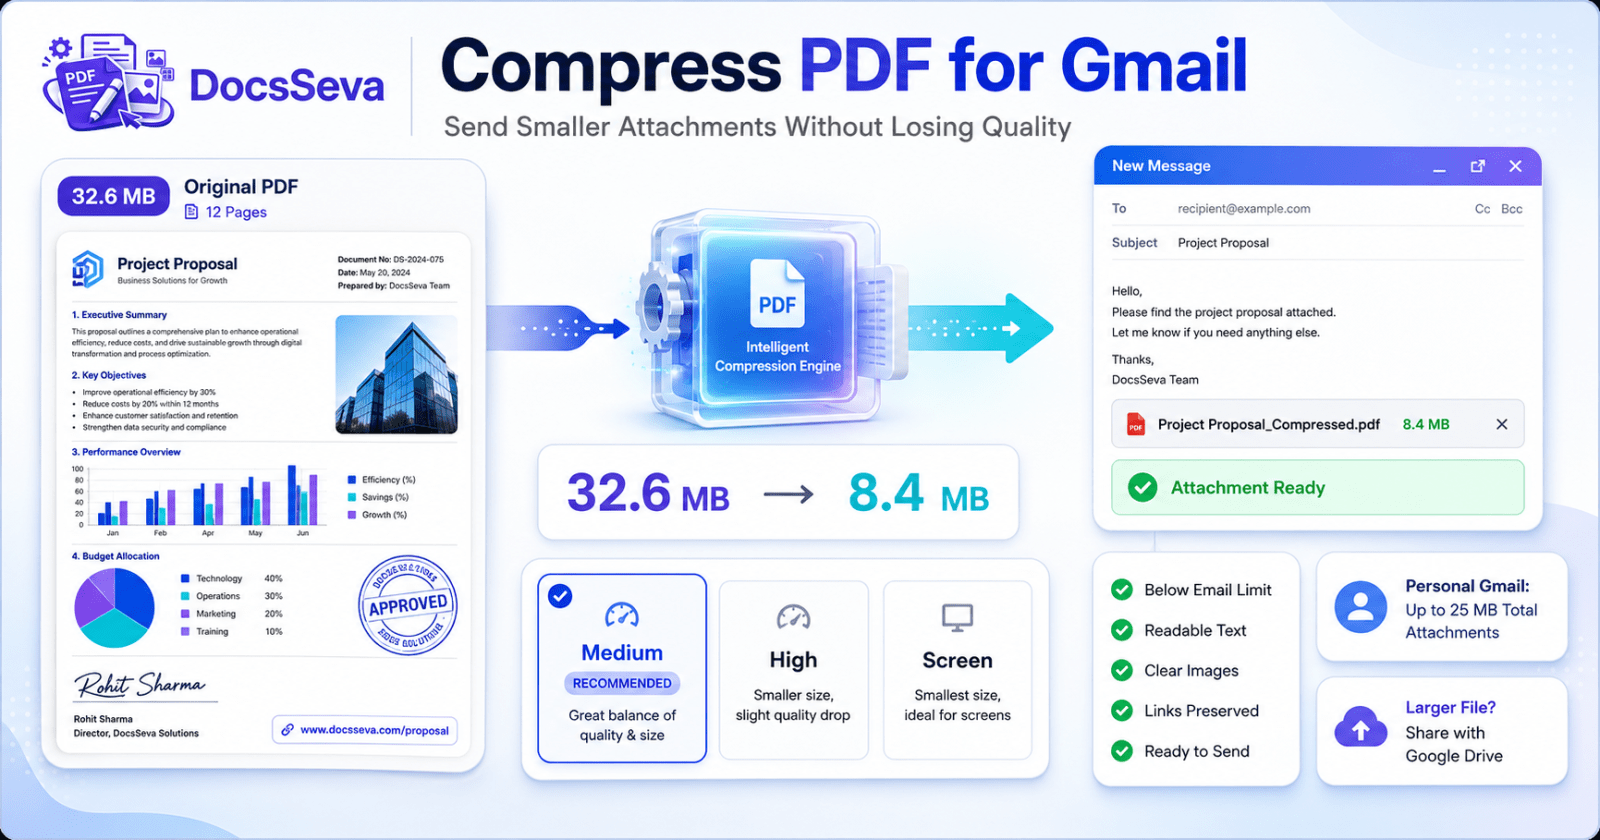
Steps
Check the complete attachment size
Review the size of the PDF and every other file being attached. Gmail applies its limit to the combined size of all attachments, not only to one PDF.
Keep the original PDF
Save an unchanged copy before removing pages or applying compression. Every new compression attempt should start from this original file.
Remove unnecessary pages
Delete blank, duplicated, outdated or unrelated pages that the recipient does not need.
Extract or split required content
Create a smaller PDF containing only the requested pages, or divide unrelated sections into separate files when appropriate.
Open the DocsSeva PDF Compressor
Open the DocsSeva PDF Compressor in a modern browser and add the PDF that you want to send through Gmail.
Start with Medium compression
Choose Medium mode first to balance file-size reduction, searchable text, image clarity and general email-viewing quality.
Retry using High compression
When the Medium result remains larger than needed, return to the unchanged original and create a new result using High compression.
Inspect the compressed PDF
Check every page, fine text, images, signatures, stamps, hyperlinks, searchable text, QR codes and final file size.
Attach the PDF in Gmail
Open Gmail, compose the message, choose the attachment option and select the reviewed compressed PDF from your device.
Use Google Drive when required
When the combined attachments exceed the applicable Gmail limit, add the PDF through Google Drive and confirm that every recipient has permission to open it.
Key takeaways
- Personal Gmail accounts support up to 25 MB in total attachments, while work and school limits may be controlled by an administrator.
- Start with Medium compression and move to High only when the PDF remains larger than necessary.
- Remove, extract or split unnecessary pages before sacrificing text and image quality.
- When a file remains above Gmail’s attachment limit, use a Google Drive link and verify the recipient’s access permissions.
When you need to compress PDF for Gmail, the goal is not simply to create the smallest possible document.
The PDF should be small enough to attach while still preserving:
- Readable text
- Clear images
- Searchable content
- Active links
- Signatures
- Official stamps
- Correct page order
- Professional document quality
Personal Gmail accounts currently allow up to 25 MB in total attachments. When several files are attached, their combined size must stay within the applicable limit.
A single PDF may therefore fit below 25 MB but still cause a problem when the same email includes photographs, spreadsheets or other documents.
When the total is too large, Gmail can use a Google Drive link instead of including the files as ordinary attachments.
This guide explains how to prepare, compress, inspect and send a PDF through Gmail without unnecessarily damaging the document.
Use the DocsSeva PDF Compressor to begin reducing your PDF.
How to Compress PDF for Gmail Attachments
Use this practical workflow:
- Check the PDF’s original size.
- Check the size of every other attachment.
- Keep an unchanged copy of the PDF.
- Remove pages the recipient does not need.
- Start with Medium compression.
- Move to High only when more reduction is required.
- Check the complete document.
- Attach the reviewed result in Gmail.
- Use Google Drive when the combined attachments remain above the limit.
Do not repeatedly compress the previous result.
Every new attempt should begin with the original file.
What Is Gmail’s PDF Attachment Size Limit?
Gmail’s attachment limit applies to the complete set of files attached to one message.
For a personal Gmail account, the published sending limit is currently:
Maximum total attachment size: 25 MB
This does not mean that every attached file can be 25 MB.
For example:
PDF report: 18 MB
Photographs: 5 MB
Spreadsheet: 4 MB
Combined size: 27 MB
The total is above 25 MB.
The PDF may need to be compressed, one or more files may need to be removed, or the documents may need to be shared using Google Drive.
Work and school accounts can be subject to administrator-configured limits. Always follow the rules applied to your organisation’s account.
Attachment Limit vs Recipient Limit
Even when Gmail accepts the attachment, the recipient’s email provider or workplace system may apply a different receiving limit.
For example, the recipient’s system may:
- Allow smaller attachments
- Block large messages
- Reject encrypted documents
- Scan attachments before delivery
- Block certain file types
- Quarantine suspicious files
- Remove messages containing restricted content
When sending an important application or business document, a PDF well below the maximum is often easier to deliver.
A practical target for one ordinary PDF can be:
Below 10 MB
or:
Below 5 MB
The appropriate target depends on the document’s content and the recipient’s requirements.
Do not reduce a high-quality document to a few hundred kilobytes when no strict limit requires it.
Why Compress a PDF Before Sending It Through Gmail?
A smaller PDF can:
- Upload faster
- Send faster
- Use less mobile data
- Download faster for the recipient
- Open more easily on older devices
- Reduce mailbox storage usage
- Avoid attachment-size errors
- Make forwarding easier
- Reduce failed sends on unstable connections
- Remain below organisational email limits
Compression can be especially useful for:
- Resumes
- Job applications
- Scanned certificates
- Bank statements
- Business reports
- Invoices
- Contracts
- Academic documents
- Portfolios
- Government forms
- Property documents
- Research papers
Check the Total Size Before Compressing
Before reducing the PDF, list every file you intend to attach.
Example:
| Attachment | Size |
|---|---|
| Resume PDF | 2.8 MB |
| Portfolio PDF | 21 MB |
| Photograph | 1.2 MB |
| Certificate | 3.5 MB |
| Total | 28.5 MB |
The message is above the standard personal Gmail attachment limit.
You could:
- Compress the portfolio
- Remove unnecessary pages
- Send the documents in separate messages
- Upload the portfolio to Drive
- Share one Drive link
- Attach only the most important files directly
The correct solution depends on the recipient’s instructions.
Keep the Original PDF
Always save an unchanged copy before compression.
Do not overwrite your only version.
Compression may affect:
- Image detail
- Scanned text
- Signatures
- Stamps
- QR codes
- Links
- Forms
- Accessibility
- Print quality
Store the original separately and give the compressed result a clear filename.
Example:
project-report-original.pdf
project-report-email-copy.pdf
Remove Unnecessary Pages First
Deleting content can reduce file size without making the remaining pages blurry.
Review the PDF for:
- Blank scanner pages
- Duplicate certificates
- Repeated cover pages
- Outdated document versions
- Unnecessary appendices
- Old drafts
- Extra instructions
- Empty separator pages
- Unrelated supporting documents
Use the DocsSeva PDF Page Remover to delete pages the recipient does not need.
Why page removal is better than extreme compression
Removing one unnecessary page:
- Reduces file size
- Does not reduce the resolution of retained pages
- Does not make retained text blurry
- Does not change the retained page layout
Try content removal before selecting the strongest compression mode.
Extract Only the Pages You Need to Email
A recipient may require only:
- The first page of a report
- A signature page
- One certificate
- A specific statement period
- Selected marksheet pages
- An invoice
- A particular contract section
Do not email a complete 80-page document when only four pages are required.
Use the DocsSeva PDF Page Extractor to create a new PDF containing only the required pages.
This can also reduce unnecessary disclosure of personal or business information.
Split a Long PDF
A large PDF may contain several unrelated document categories.
For example:
Pages 1–2: Resume
Pages 3–5: Degree certificate
Pages 6–10: Experience letters
Pages 11–18: Portfolio
The recipient may prefer separate attachments.
Use the DocsSeva PDF Splitter to divide the PDF.
Splitting is useful when:
- Separate files are easier to identify
- Only one section needs to be forwarded
- The recipient requested individual documents
- One attachment is confidential
- The complete PDF exceeds the limit
- Different files need different compression settings
Do not split a document when the recipient explicitly requires one combined PDF.
Choose the Correct Compression Mode
The DocsSeva PDF Compressor provides Low, Medium, High and Screen modes.
Each mode serves a different purpose.
Low Compression
Low compression prioritises visual quality.
Use it when:
- The original is only slightly too large
- The document contains detailed photographs
- The recipient may print the PDF
- Fine diagrams must remain sharp
- Signatures and stamps need maximum detail
- A small reduction is sufficient
Low compression may not produce enough reduction for a very large scan.
Medium Compression
Medium compression provides a balance between size and quality.
Use it as the first option for:
- Resumes
- Reports
- Invoices
- Assignments
- Certificates
- Business proposals
- Bank statements
- Contracts
- General email attachments
Medium is usually the best starting point for Gmail because it can reduce images while preserving searchable text and document usability.
High Compression
High compression applies stronger image optimisation.
Use it when:
- Medium remains too large
- The PDF contains full-page scans
- Several large files must be attached
- The recipient needs a screen-viewing copy
- A smaller file is more important than maximum print detail
After using High, inspect:
- Fine text
- Photographs
- Signatures
- Stamps
- QR codes
- Charts
- Diagrams
Screen Mode
Screen mode prioritises stronger size reduction.
It may rasterise complete pages.
Use it only when:
- The smallest possible viewing copy is required
- High compression is insufficient
- Searchable text is unnecessary
- Active links are unnecessary
- Forms are unnecessary
- High-quality printing is unnecessary
- Accessibility features are unnecessary
Screen mode can remove selectable text and document interactivity.
Read the complete comparison:
Low vs Medium vs High PDF Compression
Step-by-Step DocsSeva Compression Workflow
1. Open the compressor
Visit the DocsSeva PDF Compressor.
2. Add the original PDF
Choose the file from your device or drag it into the selection area.
Before continuing, confirm that:
- The correct document is selected
- The PDF opens normally
- Every required page is present
- The original has been backed up
- The document is not corrupted
3. Record the starting size
Example:
Original PDF: 34.2 MB
Preferred email size: Below 10 MB
4. Select Medium
Use Medium as the first attempt.
5. Download the result
Example:
Medium result: 11.8 MB
The result is smaller but remains above your preferred target.
6. Return to the original
Do not compress the 11.8 MB output again.
7. Select High
Process the unchanged original using High mode.
Example:
High result: 7.3 MB
8. Review the document
Check every page before attaching it.
The figures above are illustrative. Replace them with your actual DocsSeva test result before presenting them as evidence.
Add a Real DocsSeva Screenshot
Insert a genuine screenshot from your compressor here:

Start with Medium compression and return to the original before trying High mode.
The screenshot should show:
- Original PDF size
- Medium, High and Screen modes
- Selected mode
- Compression progress
- Final file size
- Download option
Do not use only the cover image inside the article.
How to Check the Compressed PDF
A smaller file is useful only when it remains complete and readable.
Confirm the page count
Make sure no required page is missing.
Review every page
Do not inspect only the first page.
Image-heavy pages may show more quality loss.
View the document at 100% zoom
Check:
- Fine text
- Names
- Dates
- Serial numbers
- Signatures
- Official seals
- Stamp text
- Charts
- Diagrams
- Photographs
- QR codes
- Barcodes
Search for a word
Confirm that searchable text remains available when required.
Select and copy text
Test one heading and one paragraph.
Test hyperlinks
Open:
- Portfolio links
- Website links
- Email links
- Table-of-contents links
- Document references
Check form fields
Confirm that text fields, checkboxes and signature fields remain usable when required.
Open the file in another viewer
Test the result in another browser or PDF viewer.
How to Attach the Compressed PDF in Gmail
On a computer:
- Open Gmail.
- Select Compose.
- Enter the recipient and subject.
- Select the attachment icon.
- Choose the reviewed compressed PDF.
- Wait for the upload to finish.
- Confirm the correct filename.
- Open or preview the attachment when available.
- Send the message.
On a phone or tablet, use the attachment option in the Gmail application and select the PDF from Files or Drive.
Always confirm that the attachment upload has completed before sending an important message.
What Happens When the Attachment Is Above 25 MB?
For personal Gmail accounts, files above the normal direct-attachment limit are generally handled through Google Drive.
Instead of sending the PDF as an ordinary attachment, Gmail can add a Drive link.
This changes how the recipient accesses the document.
The recipient may need appropriate permission to open it.
Before sending:
- Check the sharing setting
- Confirm the recipient’s email address
- Ensure the recipient has viewing access
- Avoid granting public access unnecessarily
- Test the link when the document is important
Use Google’s official guidance:
Send Google Drive Attachments in Gmail
Direct Attachment vs Google Drive Link
| Requirement | Direct Gmail attachment | Google Drive link |
|---|---|---|
| Small file | Suitable | Also possible |
| Combined attachments below limit | Suitable | Optional |
| File above limit | Not suitable as ordinary attachment | Recommended |
| Recipient downloads a fixed copy | Yes | Depends on permissions |
| Collaboration required | Limited | Better |
| Access permissions required | Usually no | Yes |
| Later file replacement | Does not change sent attachment | Shared Drive file may change |
| Offline access after download | Yes | Yes, after download |
Use a direct attachment when:
- The PDF is small enough
- The recipient needs a fixed copy
- The recipient requested an email attachment
- Sharing permissions would create confusion
Use Drive when:
- The file remains above the limit
- Several large files must be shared
- Collaboration is required
- The recipient needs access to updated versions
- The recipient explicitly accepts links
Compressing Multiple PDFs for Gmail
Several smaller PDFs can collectively exceed the limit.
Example:
Resume: 1.2 MB
Portfolio: 15.8 MB
Certificates: 7.6 MB
Experience letters: 4.1 MB
Total: 28.7 MB
Possible solutions include:
- Compressing the portfolio more strongly
- Removing unnecessary certificate pages
- Splitting the portfolio from the application
- Sending separate messages
- Sharing the portfolio through Drive
- Combining only required files
DocsSeva’s compressor page currently supports batch processing for multiple PDFs. Review every output separately because different document types can require different quality settings.
Compressing a Resume for Gmail
A resume should remain:
- Searchable
- Selectable
- Readable
- Professionally formatted
- Compatible with recruitment software
- Easy to download
Use this workflow:
- Remove decorative backgrounds.
- Resize oversized profile photographs.
- Export directly from the source document.
- Use Medium compression.
- Use High only when required.
- Avoid Screen mode where possible.
- Test all profile and portfolio links.
- Confirm that the text can be selected.
- Use a professional filename.
Example:
arjun-kumar-react-developer-resume.pdf
Compressing a Portfolio for Gmail
Portfolios can contain large photographs and graphics.
Use Low when:
- Image presentation is critical
- The recipient may print the file
- Fine design details must remain sharp
Use Medium when:
- The portfolio is mainly for screen viewing
- The original exceeds the preferred email size
- A reasonable balance is required
When the portfolio remains large:
- Remove duplicate projects
- Reduce oversized project screenshots
- Create a shorter email version
- Share the complete version through Drive
- Include a portfolio website link
Do not destroy the visual quality of the portfolio merely to force it into one attachment.
Compressing Scanned Certificates
Scanned certificates may contain:
- Candidate name
- Serial number
- Signature
- Official seal
- Stamp
- Decorative border
- QR code
- Coloured verification details
Use Medium first.
Move to High only when necessary.
Check every verification element before sending the result.
Strong compression may make the file smaller but can also make a certificate harder to verify.
Compressing a Bank Statement
Bank statements may contain many pages and small financial details.
Before compression:
- Confirm which period is required
- Extract only relevant pages
- Remove blank pages
- Follow appropriate privacy requirements
- Avoid sending unrelated transactions
After compression, check:
- Account details
- Dates
- Transaction values
- Balances
- Bank stamps
- Footer text
- Verification codes
Use Medium for digitally generated statements.
Compressing a Business Report
Business reports may include:
- Charts
- Tables
- Product images
- Financial data
- Screenshots
- Logos
- Links
- Appendices
Remove unnecessary appendices before applying strong compression.
Use Medium first.
Check:
- Table readability
- Chart labels
- Page numbers
- Links
- Footnotes
- Branding
- Financial values
What to Do When the PDF Is Still Too Large
Try these fixes in order.
Remove unnecessary pages
Use the PDF Page Remover.
Extract the required pages
Use the PDF Page Extractor.
Split the document
Use the PDF Splitter.
Optimise source images
Use the Image Compressor.
Resize oversized images
Use the Image Resizer.
Rebuild an image-based PDF
Use Images to PDF after optimising the source images.
Try High compression
Return to the original before creating the new result.
Use Screen mode carefully
Use it only when its text and interactivity trade-offs are acceptable.
Use Google Drive
Use a Drive link when the file remains above the applicable attachment limit.
Read:
PDF Still Too Large After Compression?
What to Do When the PDF Becomes Blurry
Do not send an unreadable file simply because it is smaller.
Return to the original and:
- Use Medium instead of High
- Use High instead of Screen
- Remove pages instead of lowering quality
- Replace poor scans
- Crop unnecessary borders
- Rebuild the PDF from clearer sources
- Send detailed pages separately
- Use a Drive link for the higher-quality version
Read:
How to Reduce PDF Size Without Losing Quality
What to Do When Gmail Upload Is Stuck
Try these checks:
- Confirm that the internet connection is stable
- Wait for the previous attachment upload to finish
- Remove and attach the PDF again
- Try another current browser
- Close unnecessary tabs
- Check available Google storage
- Confirm that the selected file is not corrupted
- Use Drive for a larger document
- Try a smaller compressed copy
Do not repeatedly click Send before the upload completes.
What to Do When the Recipient Cannot Open the PDF
Possible causes include:
- The attachment upload failed
- The wrong file was selected
- The PDF is corrupted
- The PDF is password-protected
- The Drive sharing permission is incorrect
- The recipient’s security system blocked the file
- The filename or extension is incorrect
- The recipient lacks a compatible viewer
Before sending again:
- Open the exact attached file on your device.
- Confirm that it is a valid PDF.
- Verify the password when protected.
- Check Drive permissions when using a link.
- Rename the document clearly.
- Send a fresh reviewed copy.
Should You Password-Protect the PDF?
Password protection may be appropriate for:
- Financial documents
- Private contracts
- Identity documents
- Confidential business information
- Personal records
Use the DocsSeva PDF Password tool after finalising and compressing the document.
Recommended order:
- Finalise the PDF.
- Remove unnecessary pages.
- Compress the PDF.
- Check the result.
- Add password protection.
- Attach or share the protected copy.
- Send the password through a separate channel.
Do not compress an already encrypted PDF when the compressor cannot access its content.
Common Mistakes to Avoid
Assuming one PDF can always use the complete 25 MB
Other attachments count toward the total.
Selecting Screen mode immediately
Start with Medium.
Recompressing the previous result
Begin every attempt from the original.
Checking only the file size
Review text, images, links and signatures.
Sending unnecessary pages
Extract only what the recipient needs.
Ignoring the recipient’s email limit
The receiving system may use a lower limit.
Forgetting Drive permissions
A recipient cannot open a restricted link without access.
Uploading the wrong copy
Use a clear filename and verify the file size.
Compressing after digital signing
Changing a signed PDF may invalidate its signature.
Deleting the original too soon
Keep it until the recipient confirms successful delivery.
Final Gmail Attachment Checklist
Before sending, confirm:
File size
- The PDF is small enough
- Other attachments have been counted
- The correct compressed copy is selected
- The file has a clear filename
Document quality
- Every required page is present
- Text is readable
- Images are clear enough
- Signatures remain visible
- Official stamps remain readable
- QR codes and barcodes work
- Page order is correct
Functionality
- Searchable text works
- Text can be selected where required
- Hyperlinks open
- Form fields remain active when needed
- The PDF opens in another viewer
Gmail message
- Recipient address is correct
- Subject is clear
- Attachment upload is complete
- Correct file is attached
- Drive permissions are correct
- Message text explains the attachment
- Important deadline or action is stated
Related DocsSeva Guides
- How to Compress a PDF Online for Free
- Complete Guide to PDF Compression
- How Does PDF Compression Work?
- Low vs Medium vs High PDF Compression
- How to Reduce PDF Size Without Losing Quality
- Why Is My PDF File So Large?
- How to Compress a PDF Below 500 KB
- How to Reduce PDF Size Below 1 MB
- How to Compress a PDF to a Chosen Size
- PDF Still Too Large After Compression?
Update any link whose final published slug is different.
Related DocsSeva Tools
- PDF Compressor — reduce a PDF before emailing it
- PDF Page Remover — delete unnecessary pages
- PDF Page Extractor — keep only selected pages
- PDF Splitter — divide a large document
- PDF Merger — combine only required documents
- Image Compressor — optimise source images
- Image Resizer — reduce excessive dimensions
- Images to PDF — rebuild an image-based PDF
- PDF Password — protect the approved PDF
- PDF Unlock — remove an authorised restriction
Sources and Further Reading
- Google: Send Attachments with Your Gmail Message
- Google: Send Google Drive Attachments in Gmail
- Google: File Types Blocked in Gmail
- DocsSeva PDF Compressor
Send a Smaller PDF Without Sacrificing Essential Details
To compress PDF for Gmail, begin with the original document, remove unnecessary content and use Medium compression before moving to stronger modes.
A reliable email-ready PDF should:
- Fit within the applicable attachment limit
- Remain readable
- Preserve important images
- Retain searchable text when required
- Keep signatures and stamps clear
- Maintain active links when needed
- Open correctly for the recipient
- Use a clear professional filename
When the document remains above the attachment limit, use Google Drive instead of destroying the quality through excessive compression.
Frequently asked questions
What is the Gmail attachment size limit?
Personal Gmail accounts can send up to 25 MB in total attachments. Work and school accounts may have limits configured by their Google Workspace administrator.
No. The limit applies to the combined size of all files attached to the message.
Gmail generally uploads the large file to Google Drive and adds a Drive link to the message instead of including it as a normal attachment.
How can I compress PDF for Gmail without making the text blurry?
Start with Medium compression, inspect the result and move to High only when more reduction is required. Avoid Screen mode when selectable text is important.
Which compression mode is best for Gmail attachments?
Medium is the recommended first option for most reports, resumes, invoices and digital documents. High is useful for larger scanned or image-heavy PDFs.
Should I use Screen mode for an email attachment?
Use Screen mode only when maximum reduction is necessary and the recipient does not require searchable text, active links, forms, accessibility or high-quality printing.
Can I send more than one PDF through Gmail?
Yes. You can attach multiple PDFs provided that their combined size remains within the applicable attachment limit.
Can removing pages make an email PDF smaller?
Yes. Removing blank, duplicated or unnecessary pages reduces file size without lowering the visual quality of the pages you retain.
Should I split a large PDF before emailing it?
Splitting can help when the recipient accepts several files or needs only one section. It can preserve better quality than applying extreme compression to the complete document.
Why is my compressed PDF still too large for Gmail?
The PDF may contain many scanned pages, high-resolution images, attachments, complex graphics or content that is already compressed efficiently.
Should I compress the previous compressed result again?
No. Start every new attempt from the original PDF to avoid cumulative image-quality loss.
Can PDF compression break hyperlinks?
Standard compression may preserve links, but Screen mode or page rasterisation can remove interactivity. Test every important link before sending the file.
Can compression affect signatures and stamps?
Strong image compression can soften signatures, seals and stamp text. Inspect these details at 100% zoom before sending the result.
Can I send a password-protected PDF through Gmail?
A protected PDF may be attached, but the recipient must know the password and their security system may apply additional restrictions. Share the password through a separate channel when stronger confidentiality is required.
How do I share a large PDF using Google Drive?
Add the file from Google Drive while composing the Gmail message. Gmail checks whether recipients have access and may prompt you to update the sharing permissions before sending.
Sources
DocsSeva Editorial Team
Document Workflow and PDF Tools Editorial Team
Published on August 6, 2026
The DocsSeva Editorial Team publishes practical guides about PDF compression, document conversion and online file preparation. Its content helps students, job seekers, professionals and everyday users solve file-size, email-sharing and document-upload problems.
“We tested three sample PDFs using Medium and High compression. We recorded each original and final file size, checked text selection and image clarity, and attached the approved results to Gmail drafts to confirm that the files uploaded correctly.”
Browse all tools
29+ free document tools, no account required.
Browse all toolsMore on pdf-compression
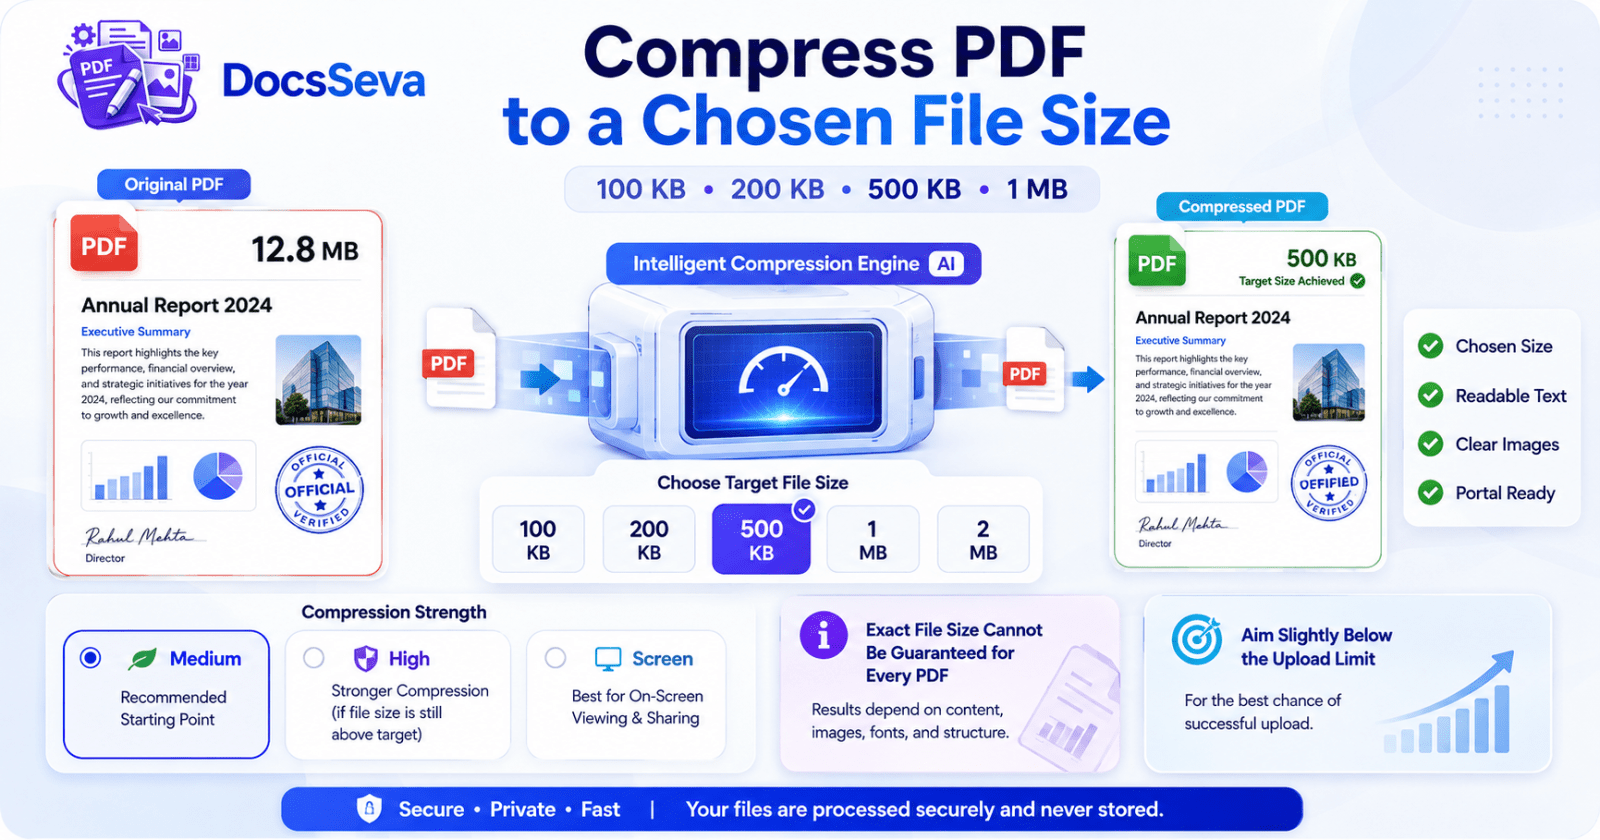
How to Compress a PDF to a Chosen File Size Without Losing Quality
Learn how to compress a PDF to a chosen file size such as 100 KB, 200 KB, 500 KB, 1 MB or 2 MB while preserving readable text, clear images and essential document details.
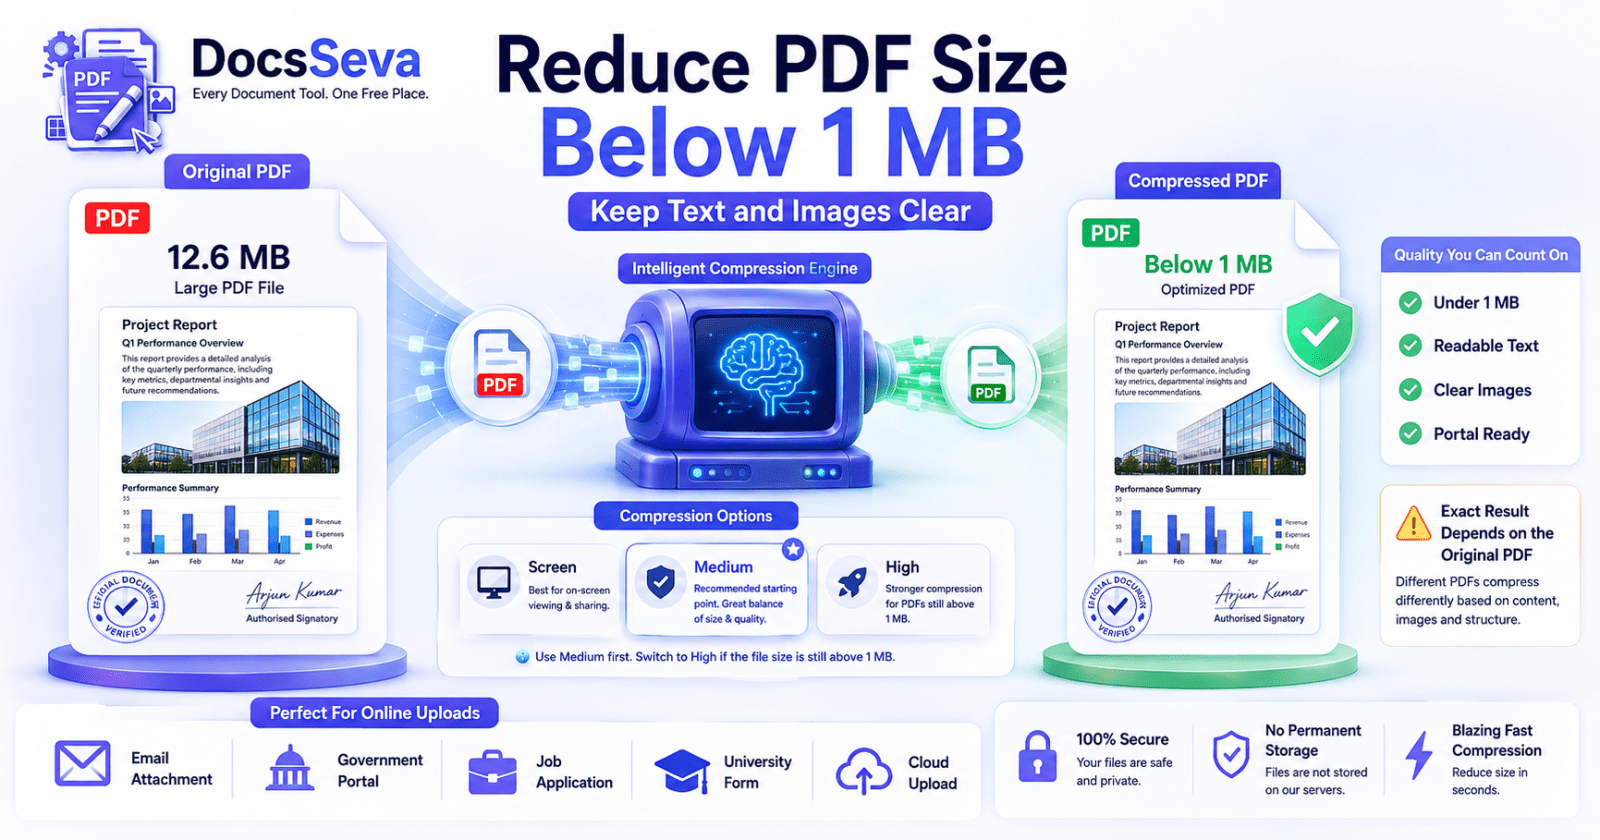
How to Reduce PDF Size Below 1 MB Without Losing Readability
Learn how to reduce PDF size below 1 MB for email, government portals, job applications and online forms while keeping text, images and signatures readable.
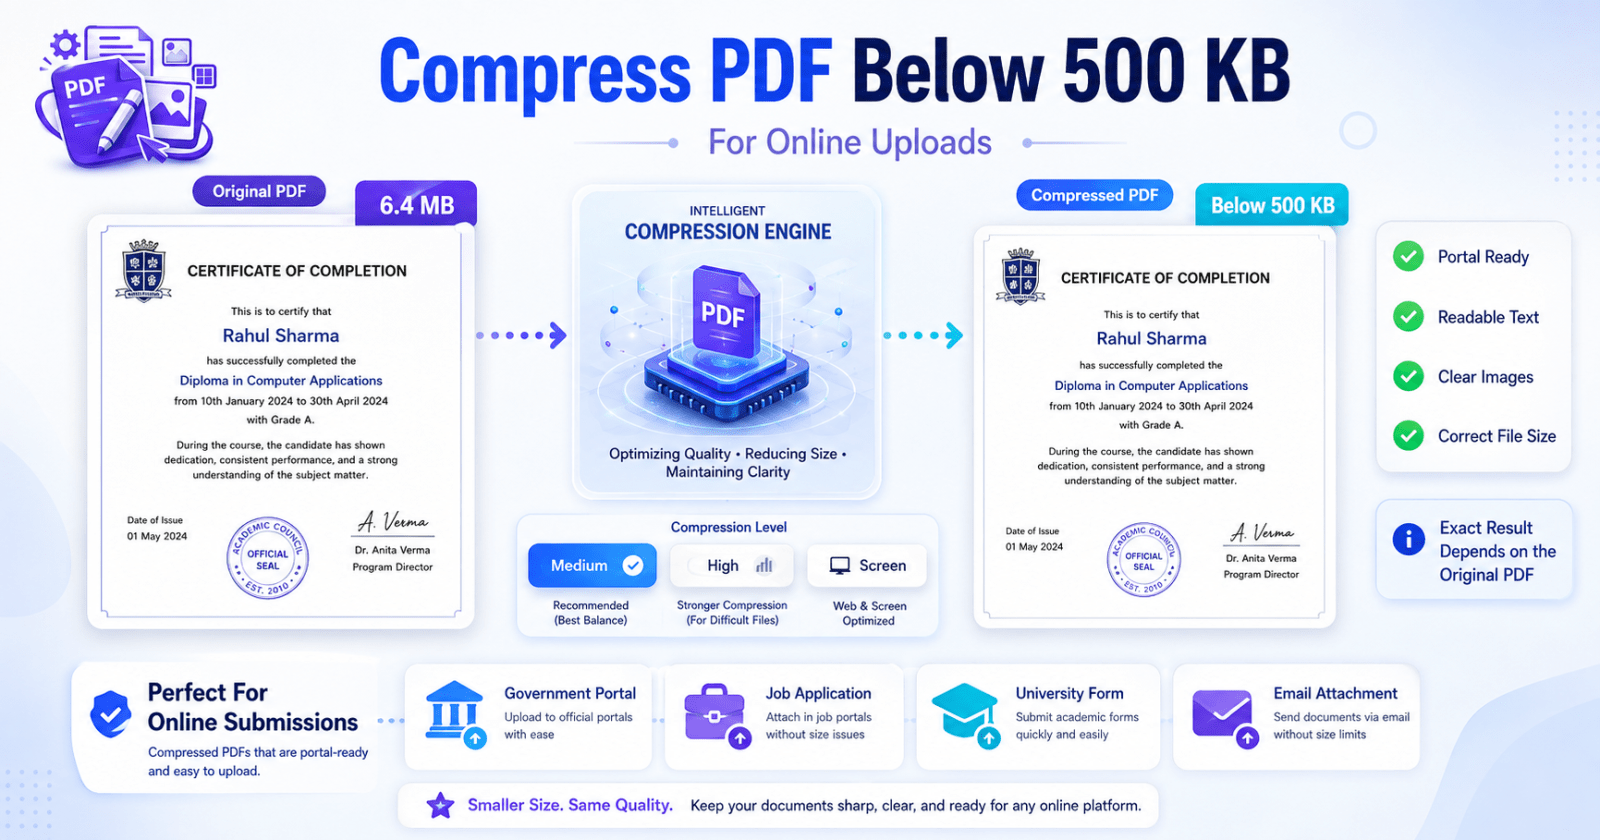
How to Compress a PDF Below 500 KB for Online Uploads
Learn how to compress a PDF below 500 KB for government portals, job applications and online forms while keeping text, signatures and images readable.